Onboarding wizard#
The onboarding wizard appears the first time you launch Lens K8S IDE after signing in. It walks you through five steps: cloud Kubernetes environments, local kubeconfigs, the AI tool for Ask AI, the Lens MCP Server, and GitOps. A Steps to start X/5 counter tracks your progress.
Move between steps with Next and Back. The final step replaces Next with Go to Lens, which closes the wizard. Close the wizard at any time with the X in the top-right corner.
Tip
To reopen the wizard later, select Help > Welcome, then select Open Onboarding Wizard... under Start.
Premium features in the wizard
Some of the features in the wizard need a Lens premium subscription. See Premium Features.
Prerequisites#
- Lens K8S IDE installed
- Lens K8S IDE activated with a Lens ID
Step 1: Kubernetes Environments#
The first step connects cloud-based Kubernetes environments through the built-in native integrations. It shows an Azure AKS, an AWS EKS, and a Google GKE section, each with a button to start the account-connection flow and a connection status at the right edge. Hover the status to see the connected accounts or projects.
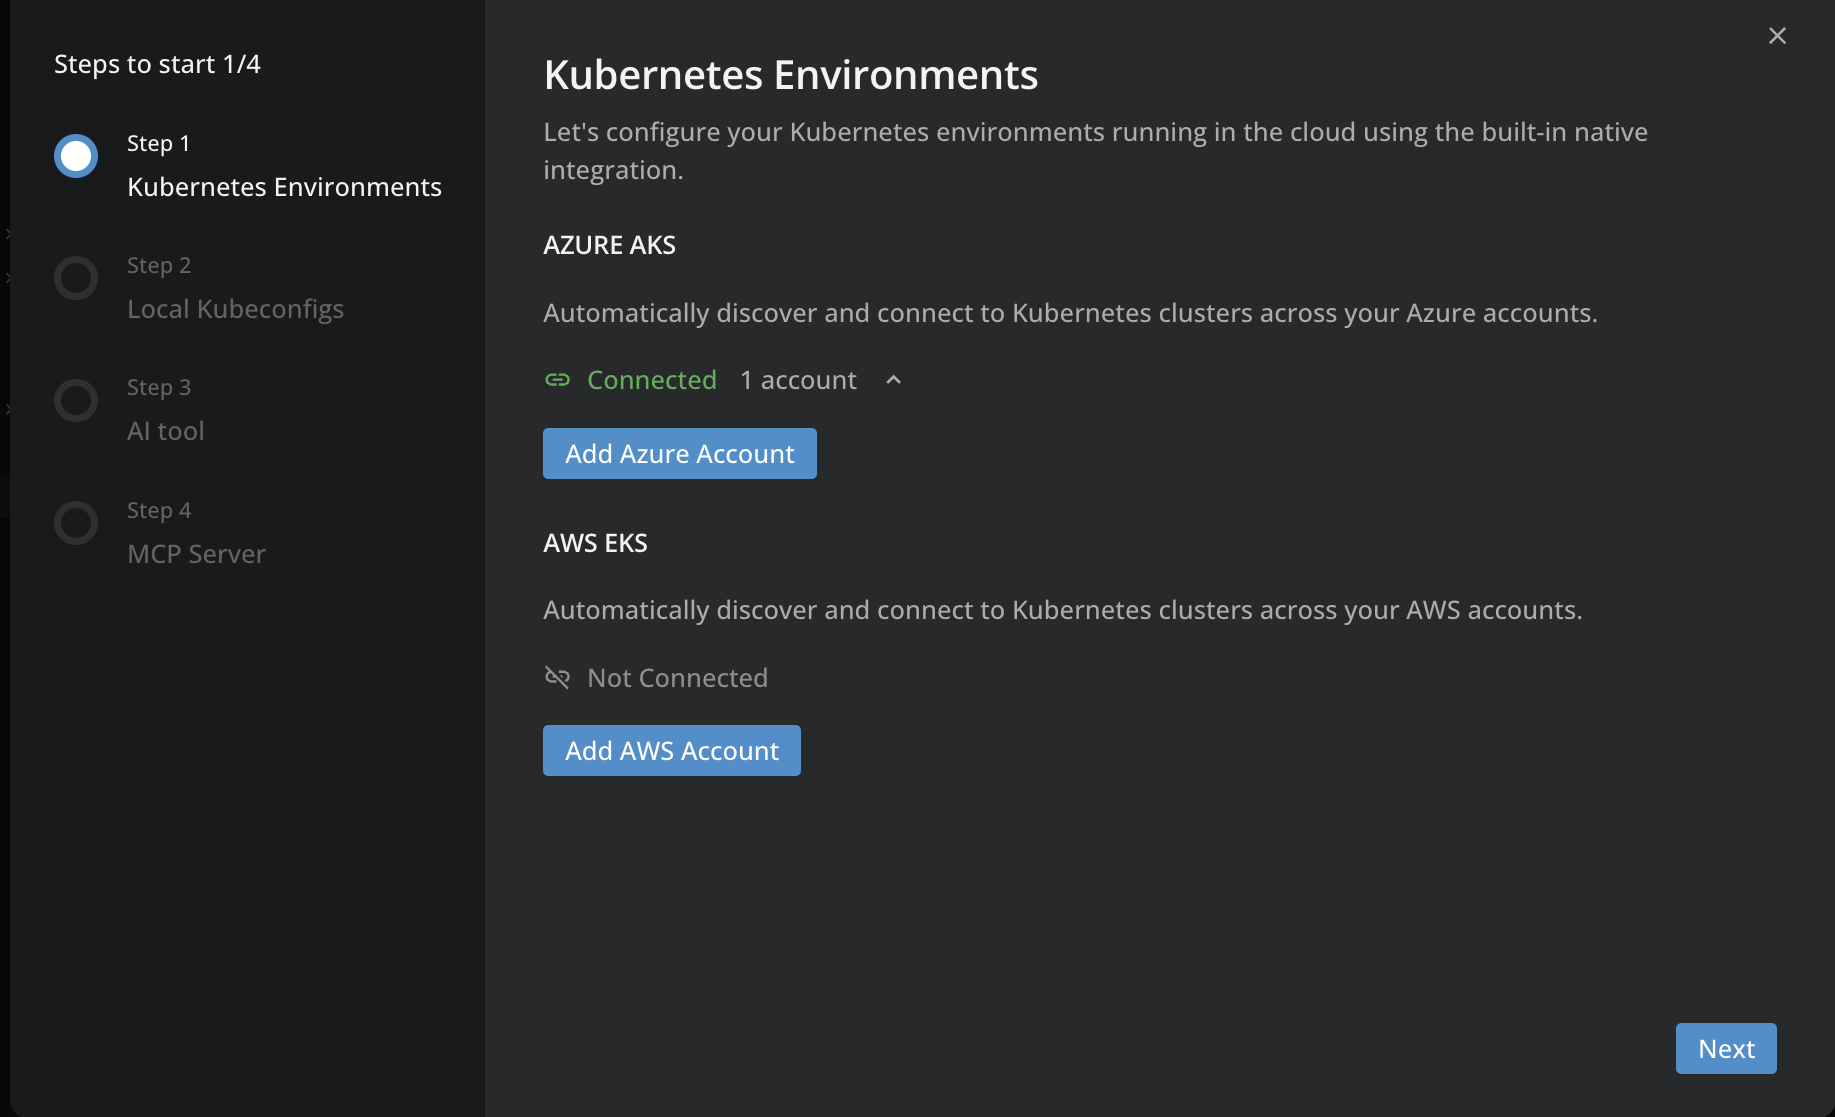
Azure AKS: select Add Azure Account to start the Azure OAuth flow. Lens K8S IDE authenticates with your Azure account and discovers AKS clusters across your Azure subscriptions. For authentication options, see Add Azure AKS clusters.
AWS EKS: select Add AWS Account to start the AWS flow. Lens K8S IDE discovers EKS clusters across your AWS accounts using the credentials you supply. For options (SSO, Access Key, IAM Role), see Add AWS EKS clusters.
Azure AKS and AWS EKS are premium subscription features. When your plan does not include them, the Add Azure Account and Add AWS Account buttons are disabled, and pointing at a button shows the reason.
You do not need to connect both providers now. Connect what you need and add the rest later from Preferences > Integrations. Select Next to continue.
Step 2: Local Kubeconfigs#
The second step connects local kubeconfig files. It shows a Local Kubeconfigs section with a connection status and the number of watched sources, for example Connected 1 source. Select Connected 1 source to show the table of watched paths (Path, Type, Clusters). By default, Lens K8S IDE watches ~/.kube (macOS and Linux) or %USERPROFILE%\.kube (Windows), and picks up changes to those files in real time without a restart.
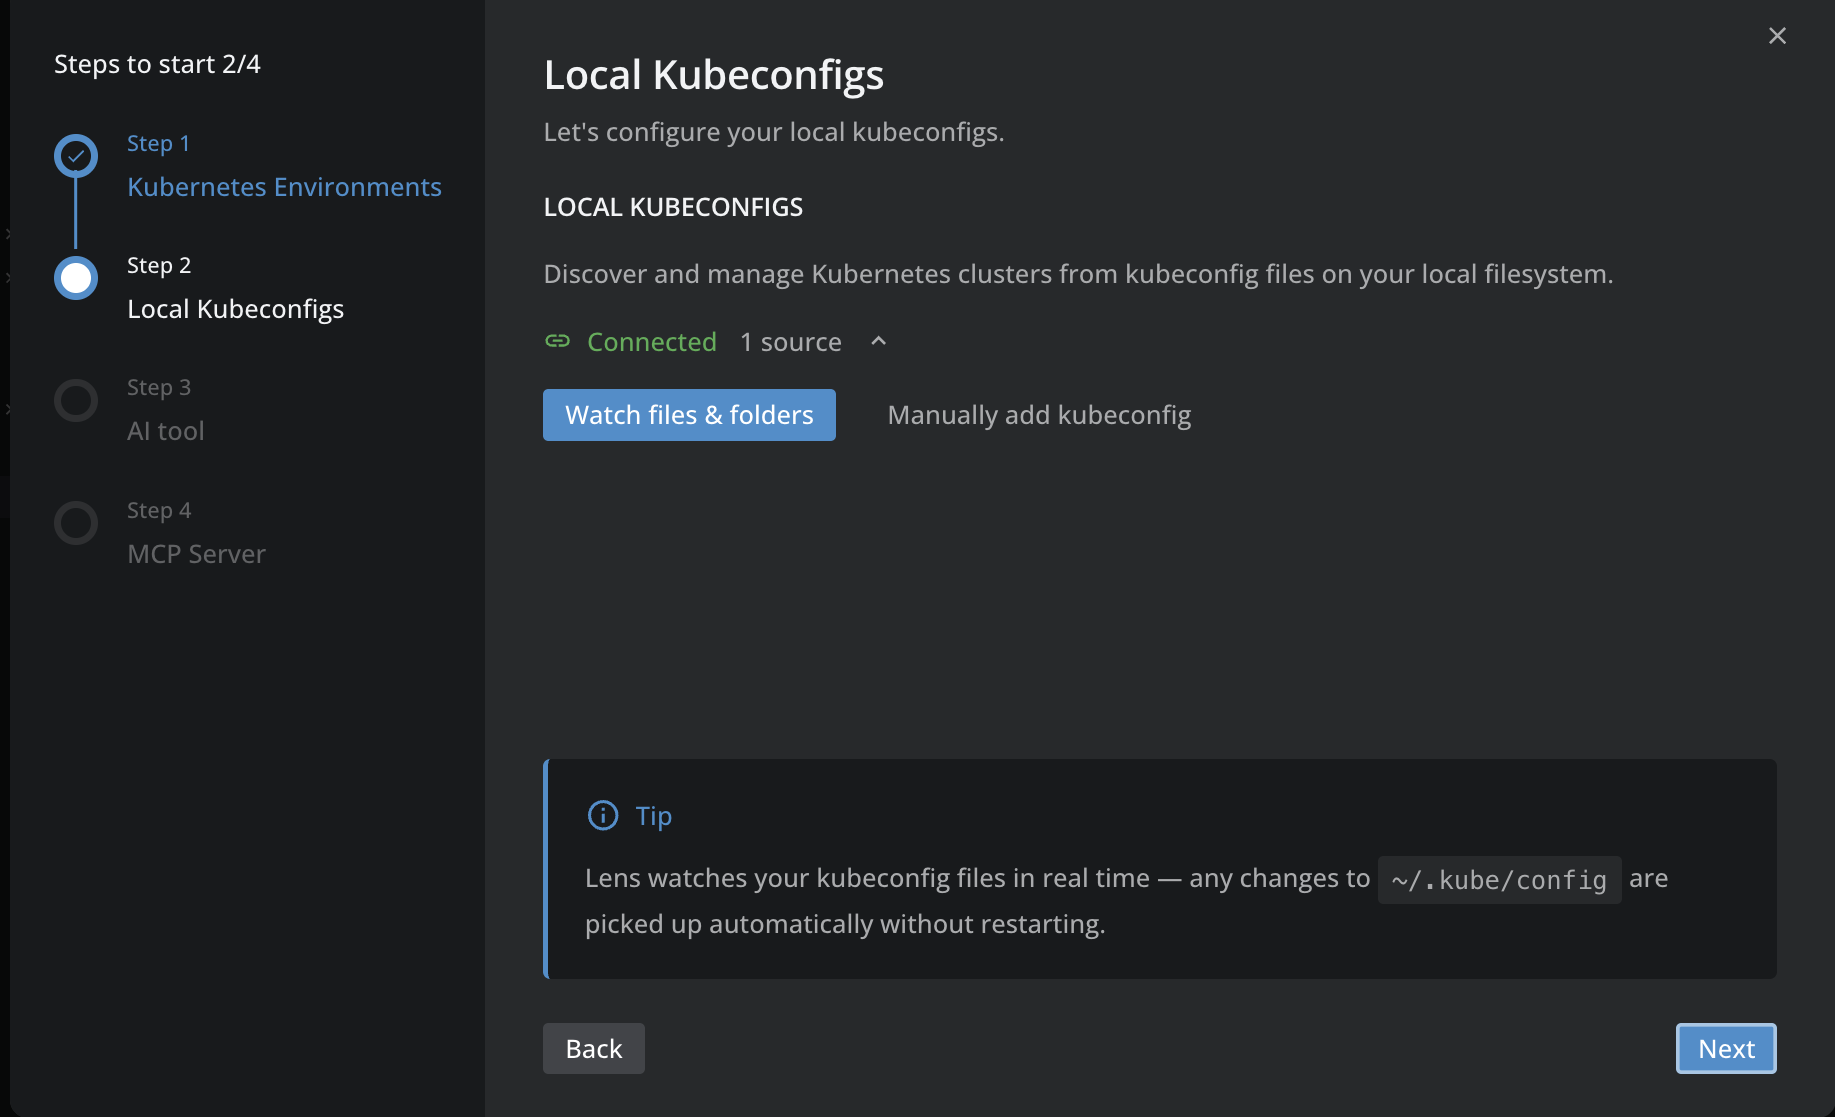
- Watch files & folders: open a picker to add more kubeconfig paths to watch.
- Manually add kubeconfig: paste kubeconfig content directly instead of pointing to a file.
For the full local-cluster workflow (pasting, importing, custom sync paths), see Add a local cluster. Select Next to continue or Back to return.
Step 3: AI tool#
The third step selects the AI tool that Lens K8S IDE uses for Ask AI. The header shows how many supported tools it detects on your system, for example 2 of 5 detected on your system, with a Refresh link.
Select the AI tool you want Ask AI to launch, such as Claude Code or Gemini CLI. A tool found on your PATH is marked INSTALLED. A tool that is missing offers an Install link and names the command it looked for, as in CLI-command "gemini" not found in PATH. The last entry, Custom, runs a command you configure on the Preferences > External Tools page. You can change this selection later on the Preferences > External Tools > AI tool page. For the full list of tools and setup details, see Configure Ask AI.
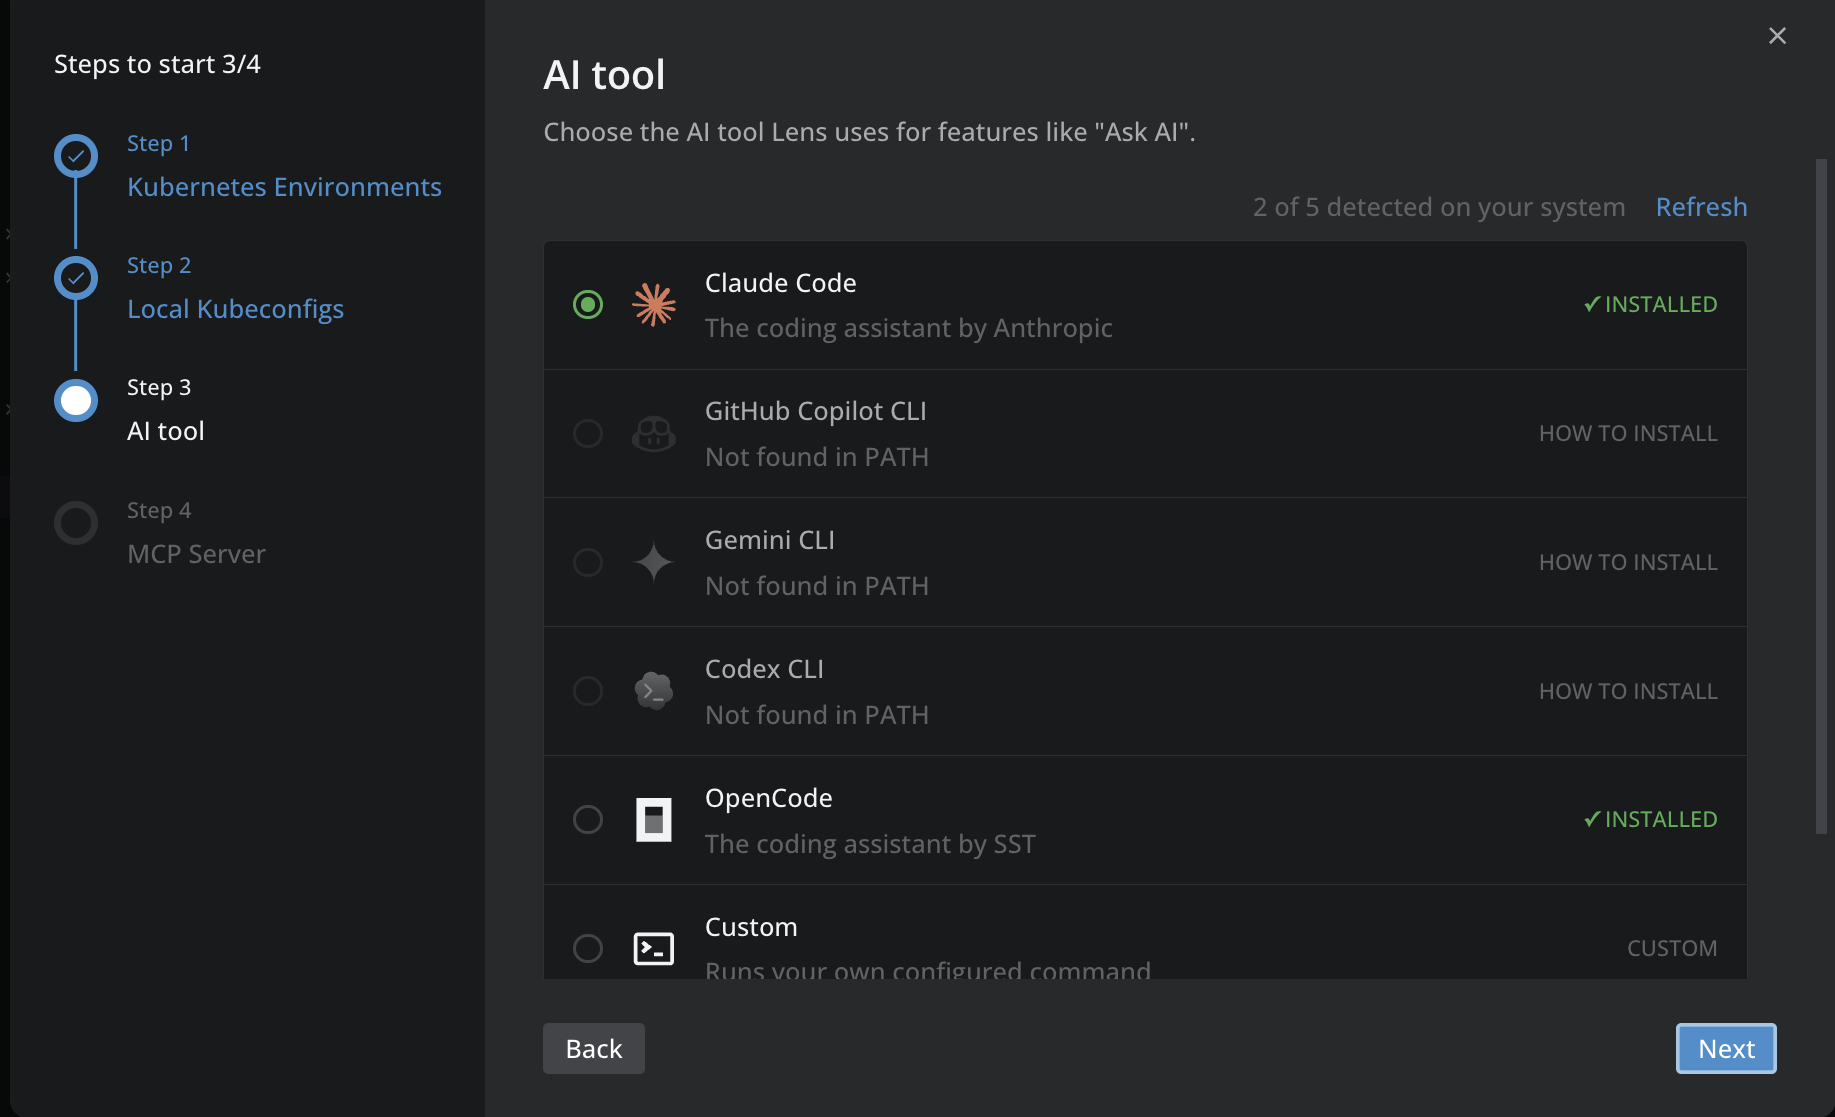
Select Next to continue or Back to return.
Step 4: MCP Server#
The fourth step enables the Lens MCP Server and provides the configuration snippet for your MCP client. It shows an Enable Lens MCP Server toggle. Turn it on to expose Lens capabilities through the Model Context Protocol (MCP). It works with Claude Code, Cursor, GitHub Copilot, and other MCP-compatible clients.
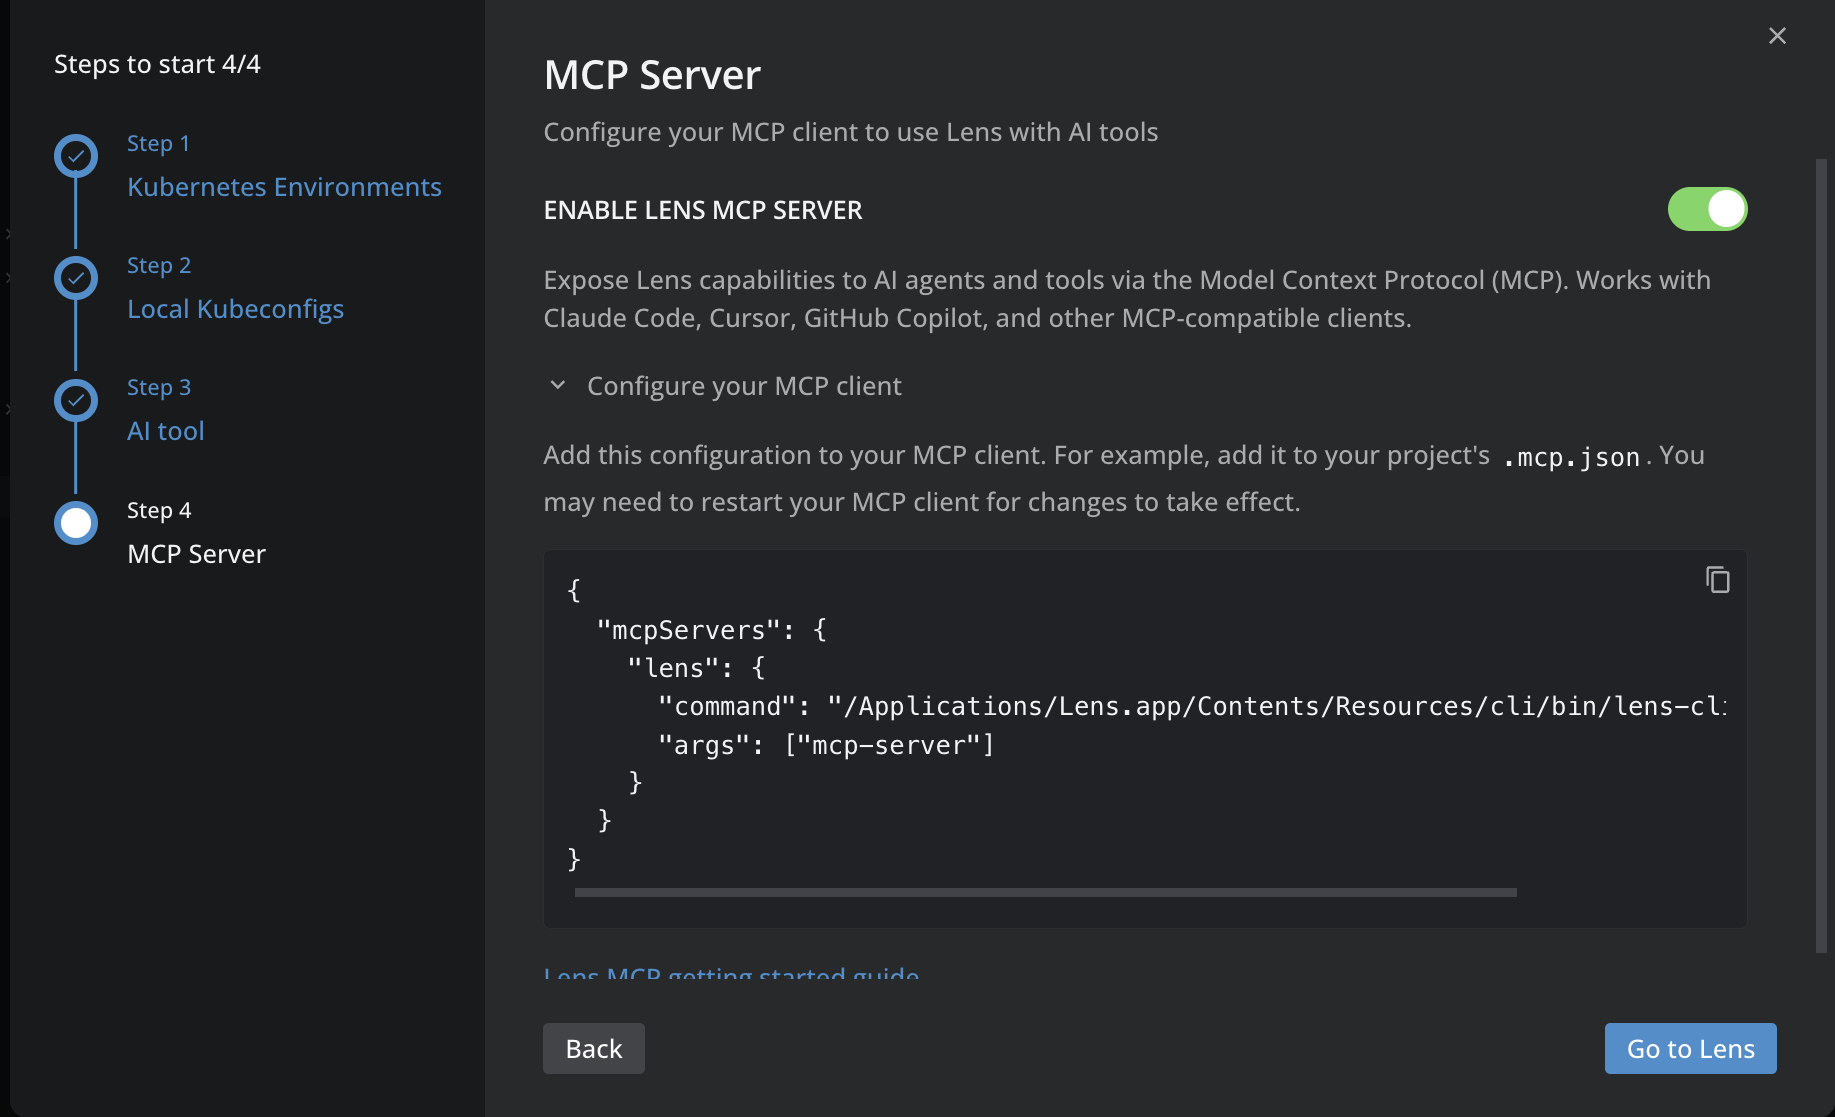
Expand Configure your MCP client to reveal the snippet. Lens K8S IDE generates it with the absolute path to the bundled Lens CLI. Your MCP client can then launch the server without reading your shell PATH:
{
  "mcpServers": {
    "lens": {
      "command": "/Applications/Lens.app/Contents/Resources/cli/bin/lens-cli-...",
      "args": ["mcp-server"]
    }
  }
}
Select the copy icon, then paste the snippet into your MCP client configuration (for example, .mcp.json in your project root). The path in the command field differs per platform and install location, so always copy the snippet from the wizard rather than typing it. Restart your MCP client for the change to take effect. For a full walkthrough, see Get started with Lens MCP Server.
Select Next to continue or Back to return. The step has no Skip button. You can continue without enabling the server.
Step 5: GitOps#
The final step shows where Lens K8S IDE surfaces your GitOps state. Both entries are premium subscription features, included with the Plus, Pro, and Enterprise plans:
- Argo CD: sync and health across every Argo CD Application and the resources it manages. See Argo CD.
- Flux: Kustomizations, Helm releases, and their sources with live readiness. See Flux CD.
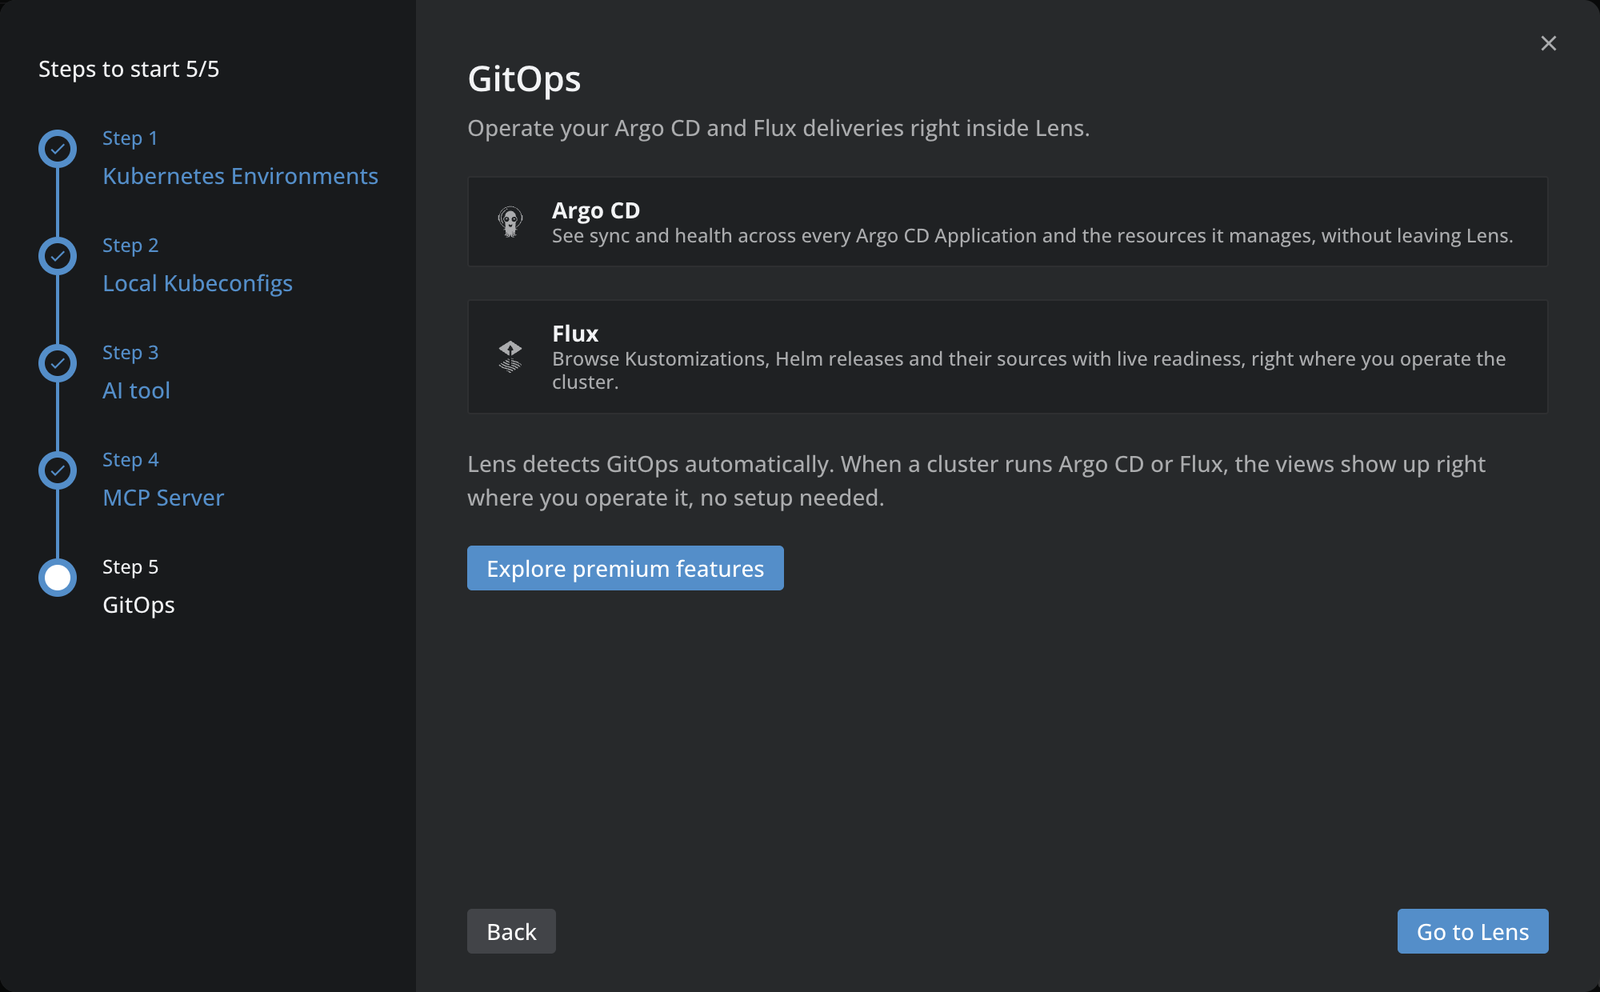
There is nothing to configure here. Lens K8S IDE detects GitOps automatically. When a cluster runs Argo CD or Flux, the entry appears in that cluster's navigator after Lens K8S IDE reads the cluster's CRDs during connection. Disconnect and reconnect the cluster to refresh it.
Select Explore premium features to open the Premium Features dashboard, which lists both under GitOps.
Select Go to Lens to close the wizard, or Back to return. This step has no Finish or Skip button; Go to Lens is the exit action.
Verify the setup#
After the wizard closes, confirm that your configuration is active:
- Open the Catalog in the left sidebar and check that your connected clusters appear in the list.
- Open Ask AI and send a test prompt.
Change settings later#
Change these settings at any time from Preferences:
- Cluster connections and the Lens MCP Server toggle: Preferences > Integrations.
- The AI tool selection: Preferences > External Tools > AI tool.