Clone an extension#
Lens premium subscription feature. See details on Lens Pricing.
Clone a marketplace extension to start your own local extension from working code instead of a blank project. Lens copies the extension's Git repository to your machine, builds it, installs it, and opens it in your AI tool, ready for you to change.
Use a clone to adapt an extension to your team, to fix something in it, or to learn how it is built. When you improve it, send the change back to its author as a pull request.
Info
Cloning works only for an extension whose author linked a Git repository: a public one, or a private one your Git host already lets you read. Extensions without a linked repository have no Clone button.
Prerequisites#
- An extension that shares its source. Clone appears only on extensions whose author linked a repository. See Share the source on Git.
- Access to the repository, if it is private, with Git on your machine already signed in to the Git host. Lens cannot ask for a password.
- Git installed on your machine. When Git is missing, Clone is turned off, says "Install Git to clone extensions.", and the details page links to the Git downloads page.
- Node.js and npm installed. Lens uses them to install the extension's dependencies and build it.
- Local extensions allowed by your organization, if it manages extensions. See Extension governance.
Clone from the marketplace#
To clone an extension:
- Open Browse Marketplace from Extensions in the Navigator, and find the extension.
-
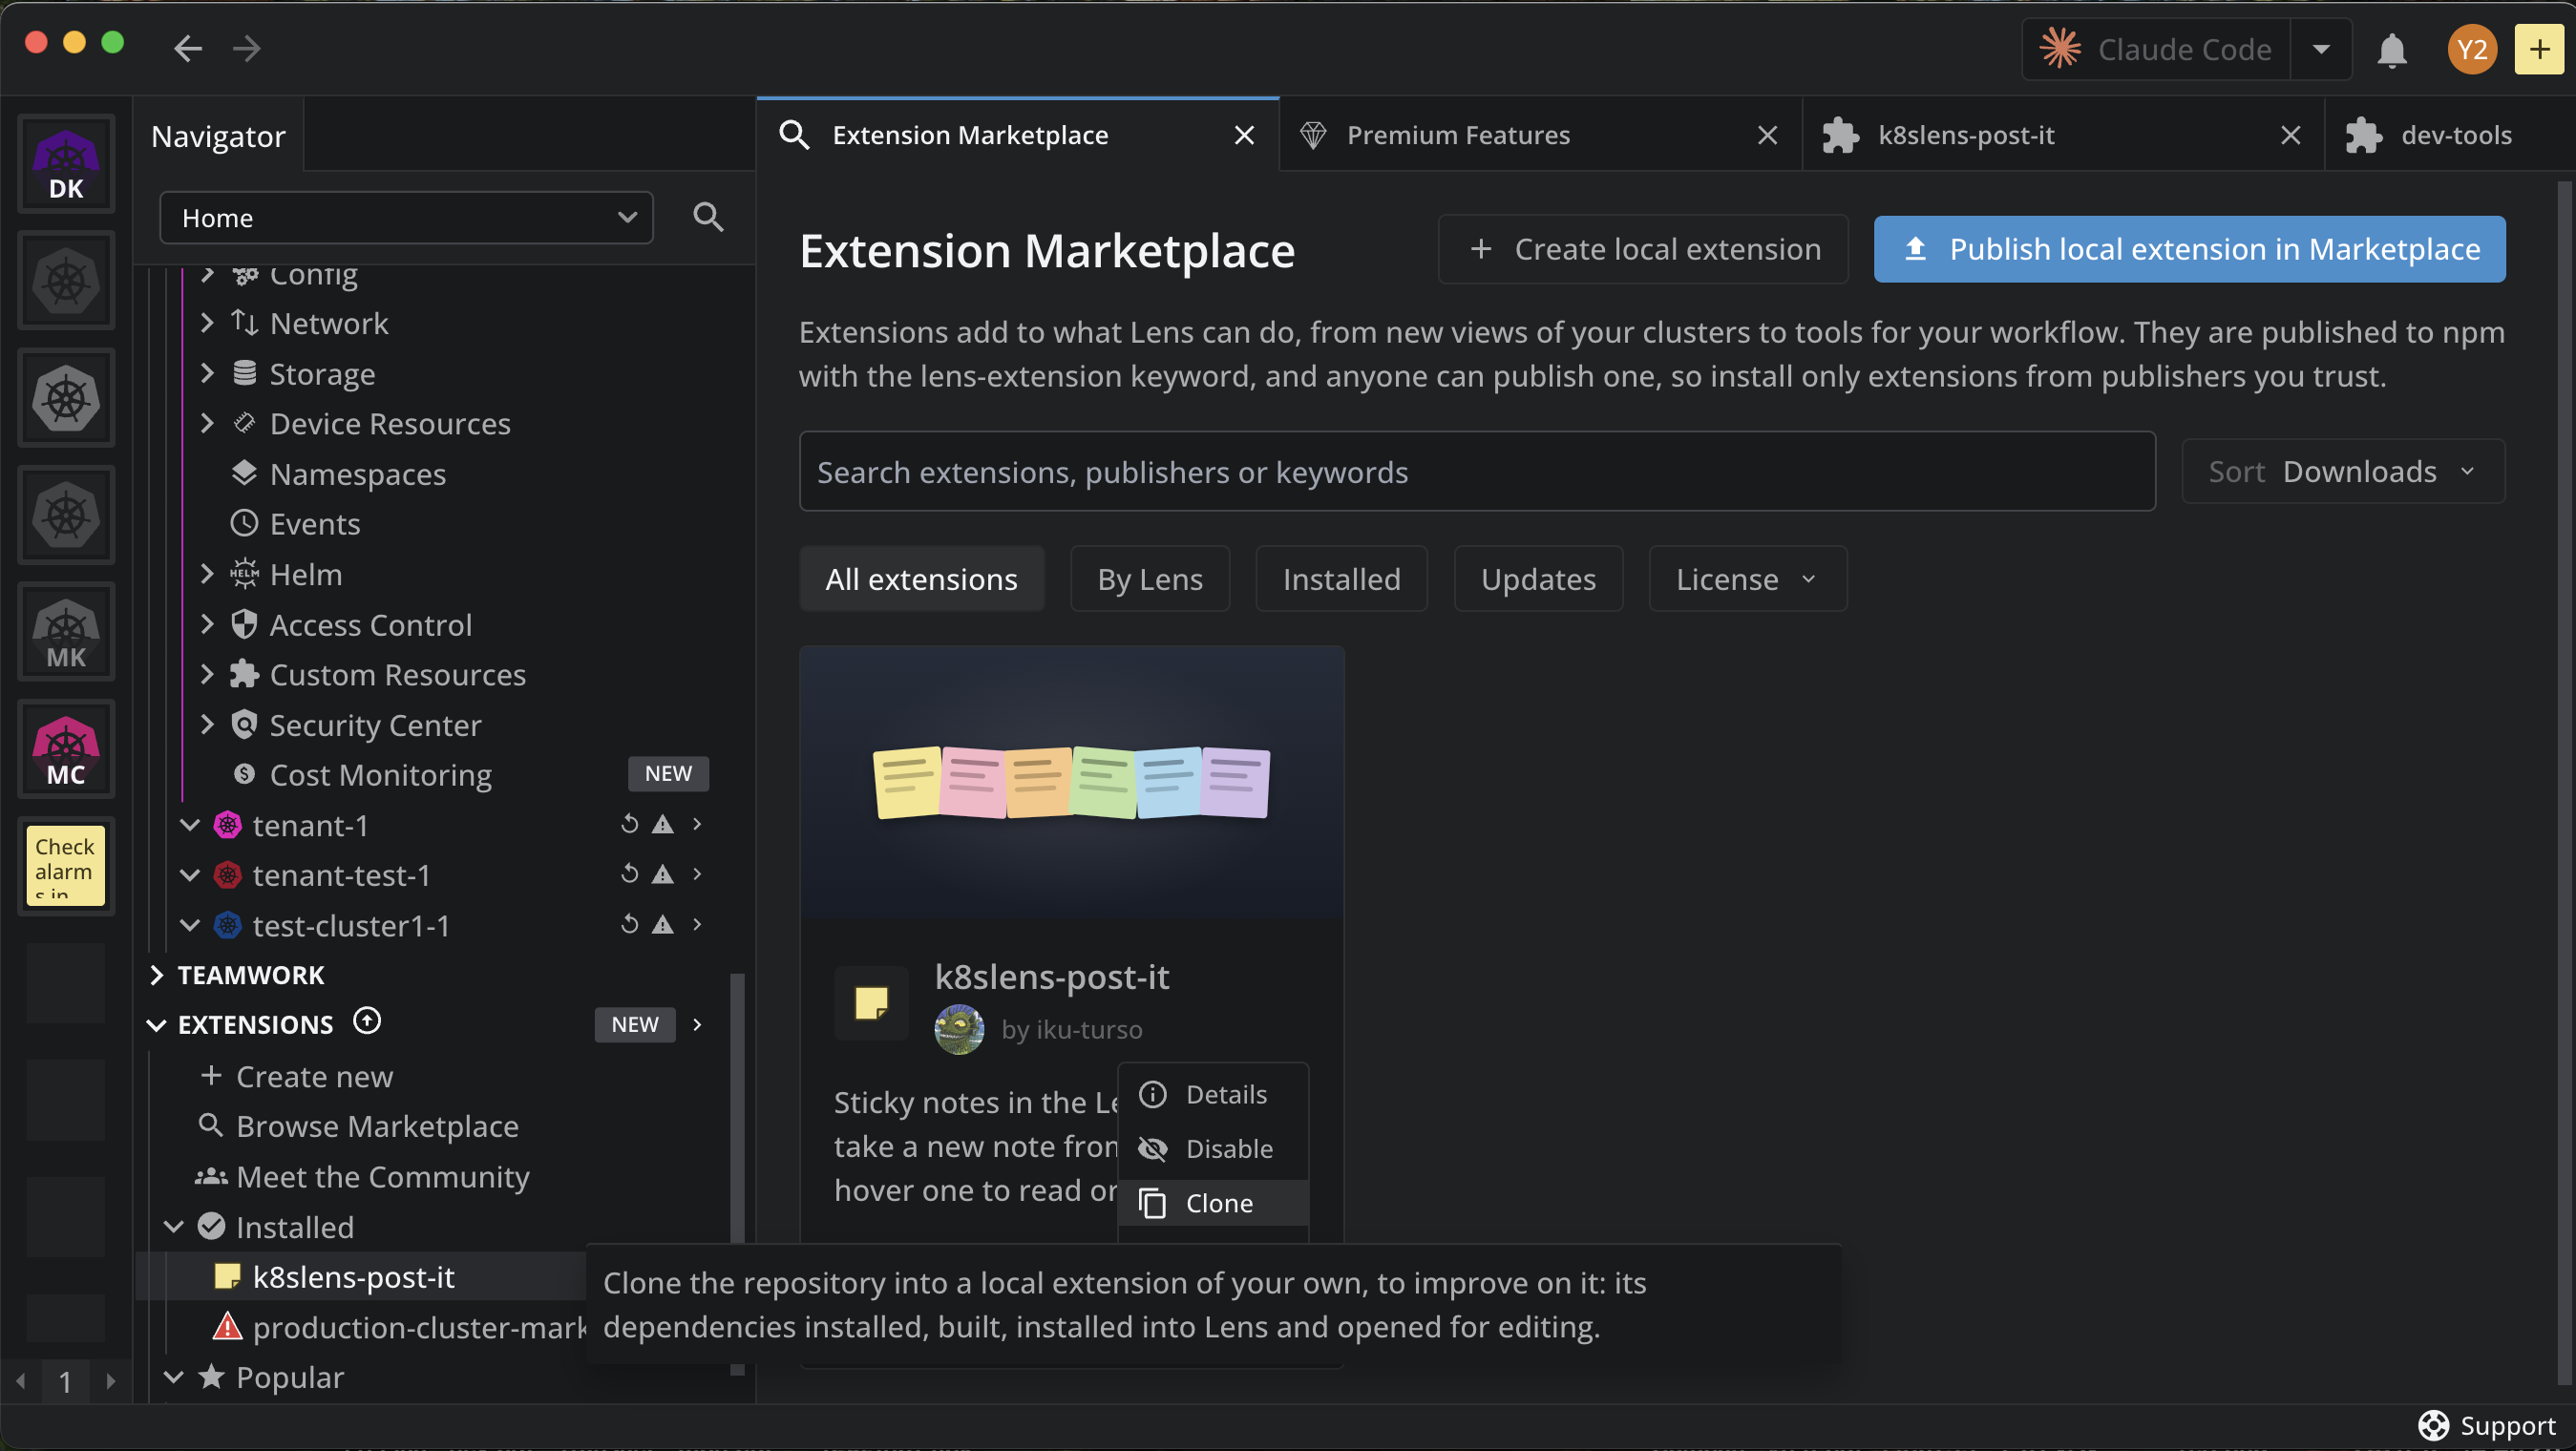
Click Clone. It is in three places:
- The extension's details page, next to Install or Uninstall.
- The extension's card in the marketplace. On the card of an extension you already installed, Clone is in the ... menu, next to Details and Disable.
- The card of an installed extension under Extensions > Installed in the Navigator, and its right-click or ... menu.
-
In the Clone dialog, check the repository and the folder Lens clones into, and click Clone.
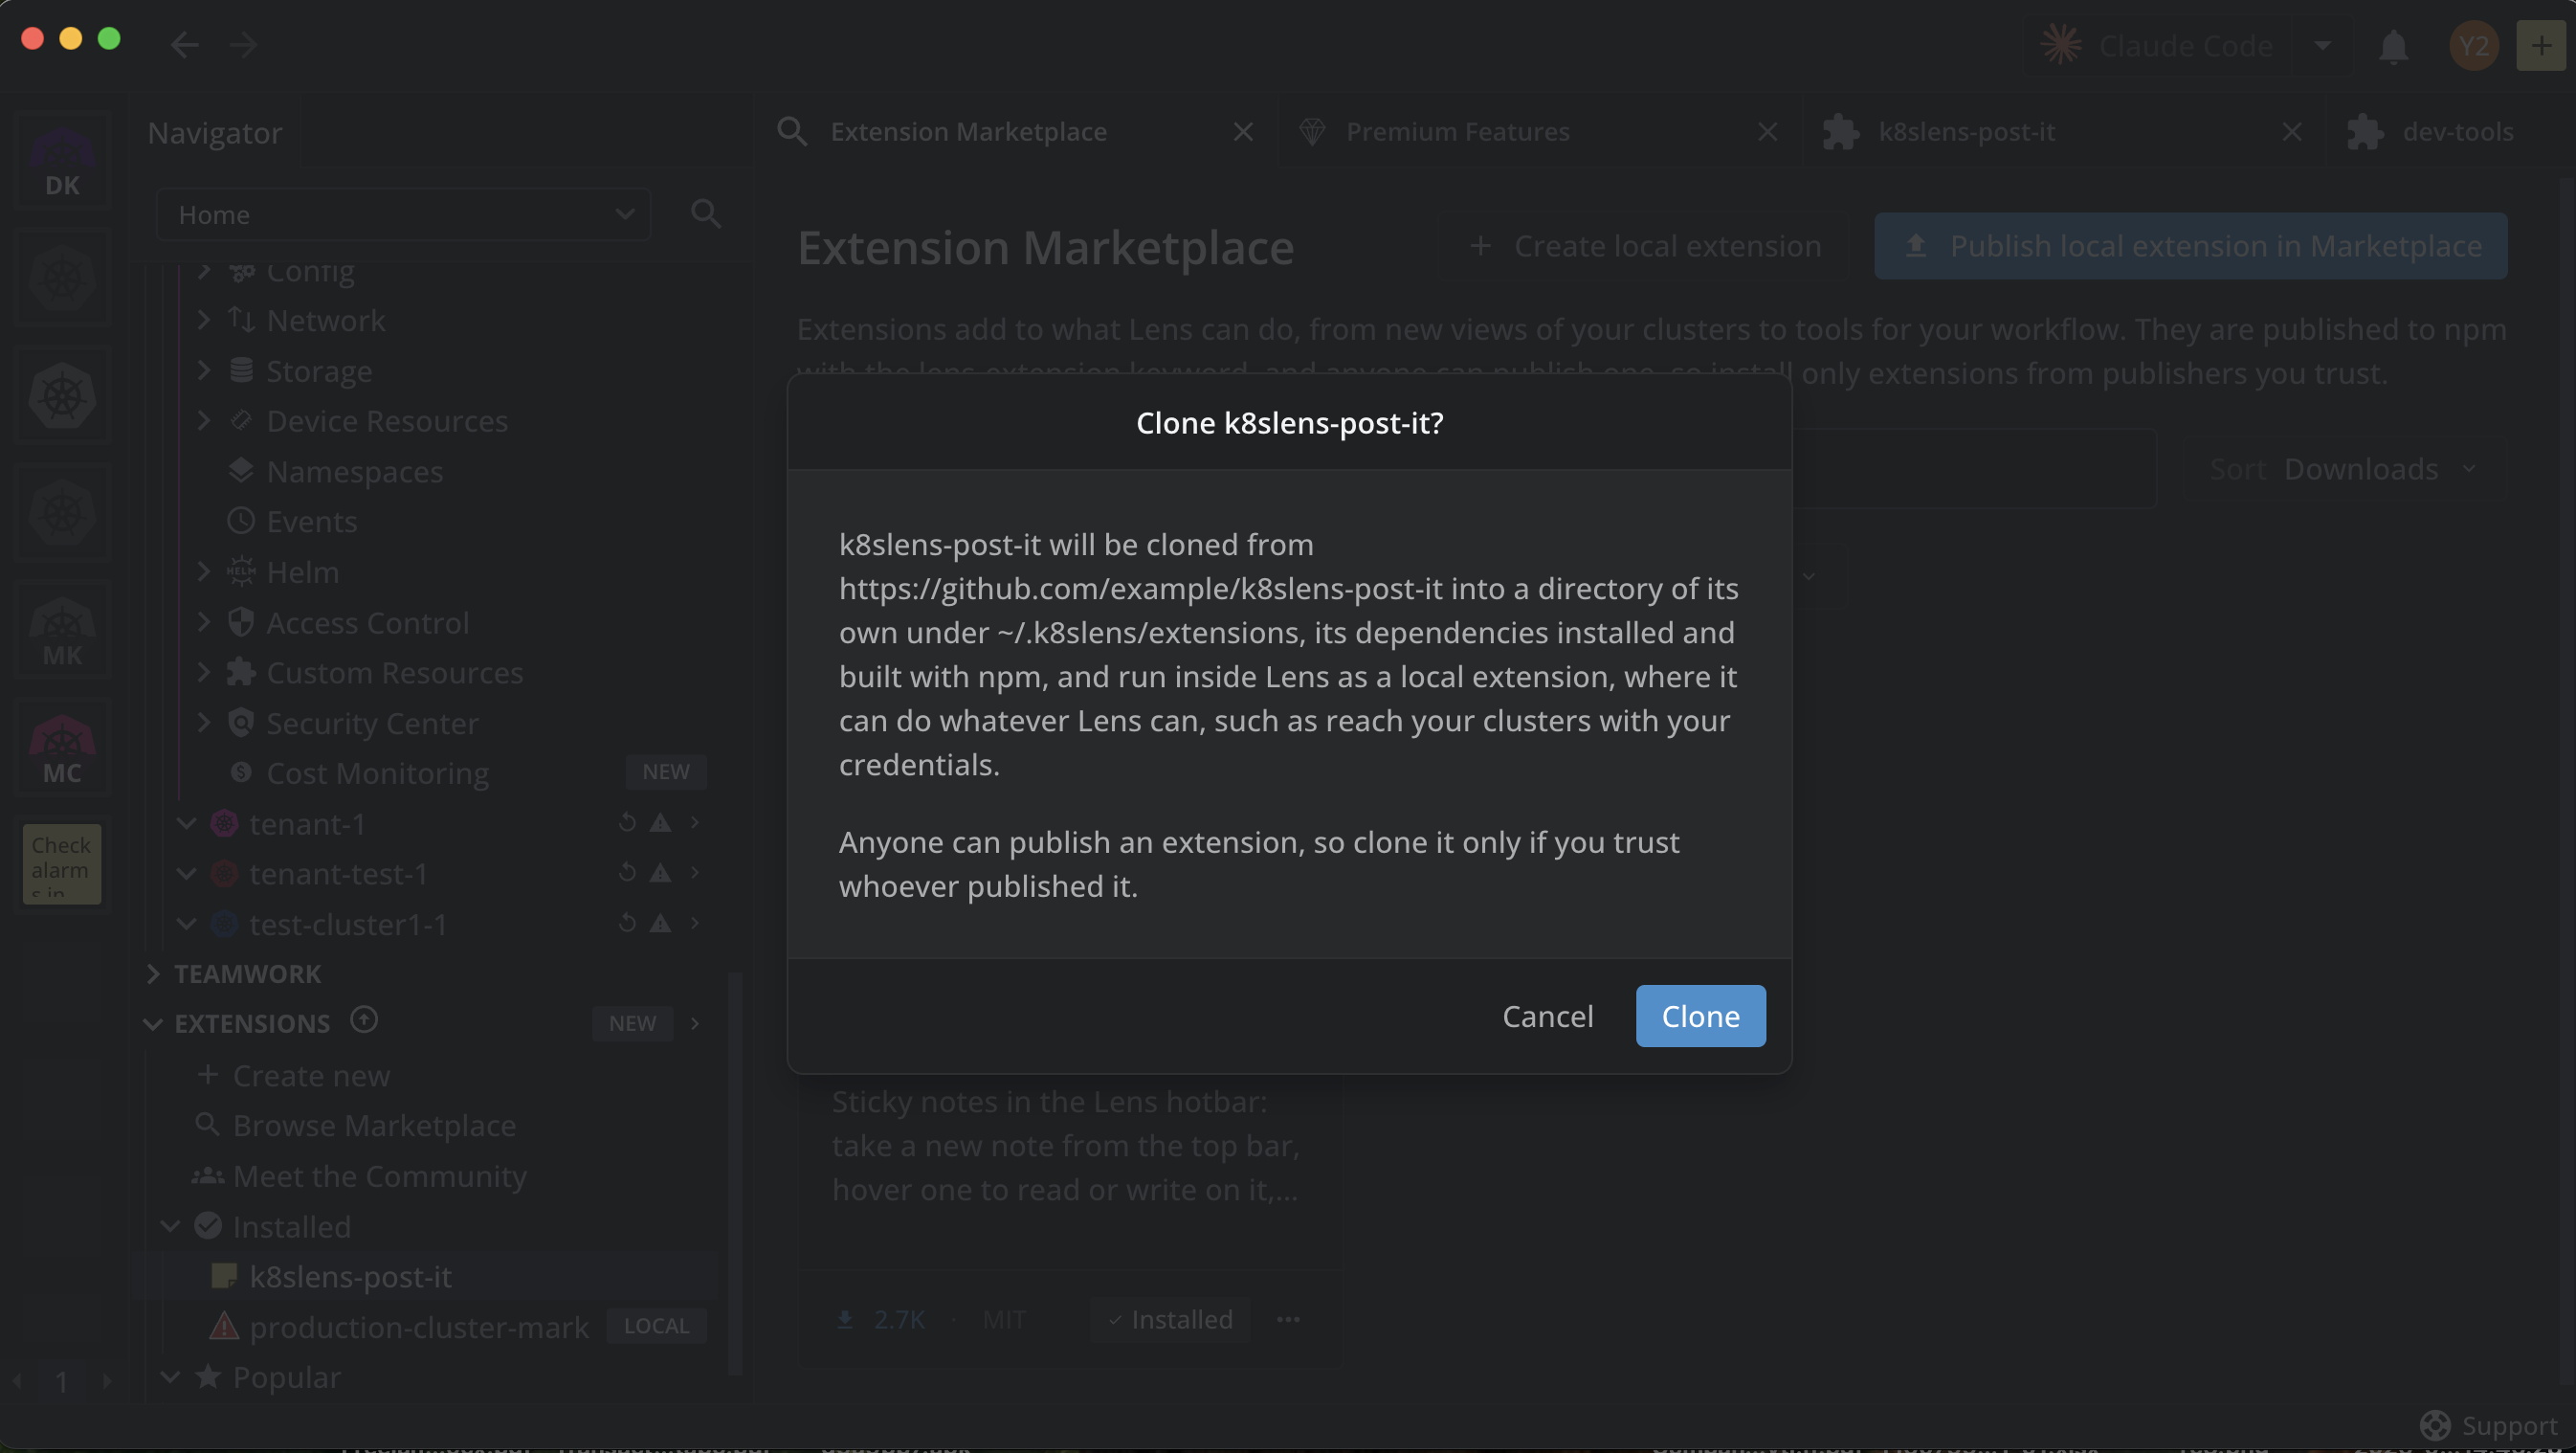
Lens then:
- Clones the repository into a folder of its own under
~/.k8slens/extensions/, named after the extension without its npm scope. If that folder exists, Lens adds a number, such as-2. - Installs the dependencies with
npm install, and builds the extension withnpm run build. - Installs the clone as a local extension, with the LOCAL mark under Installed.
- Opens it in a tab named Edit: followed by the extension name, with your AI tool running in the clone's folder.
Installing the dependencies and building can take a while. A notification says when the clone is installed. If you cloned the same extension before, Lens opens the existing clone instead of cloning it again.
Note
A cloned extension runs inside Lens with your credentials, like any installed extension. Clone only extensions from publishers you trust.
Work on the clone#
The clone is your own local extension. Change it the way you change one you created: describe what you want in its Edit tab, and Lens loads each rebuild on its own. See Create an extension.
If you also installed the original extension from the marketplace, Installed lists both. Disable one of them while you work, so they do not add the same things to Lens twice. See A local copy and its published version.
Send your changes back#
A clone is a regular Git working copy of the author's repository. To contribute a change to the original extension:
- Make the change in the clone's Edit tab, and try it in Lens.
- Fork the original repository on your Git host, and push your change to the fork.
- Open a pull request against the original repository.
When the author merges it and publishes a new version, everyone who installed the extension gets the change as an update.
To publish the clone as an extension of your own instead, give it a new name in package.json first. See Publish an extension.